In the world of eCommerce, Shopify is one of the best brands. More than 1.75 million merchants sell on the platform and currently 17, 683 domains are active on it.
Wondering what attracted such a huge population of merchants towards it? Its seamless interface and easy-to-use development features. So, if you find trouble understanding how to make a Shopify store you are in the right place. Here is a comprehensive guide to the step-by-step development of an engaging eCommerce store within minutes.
8 Easy Steps to eCommerce Website Development on Shopify
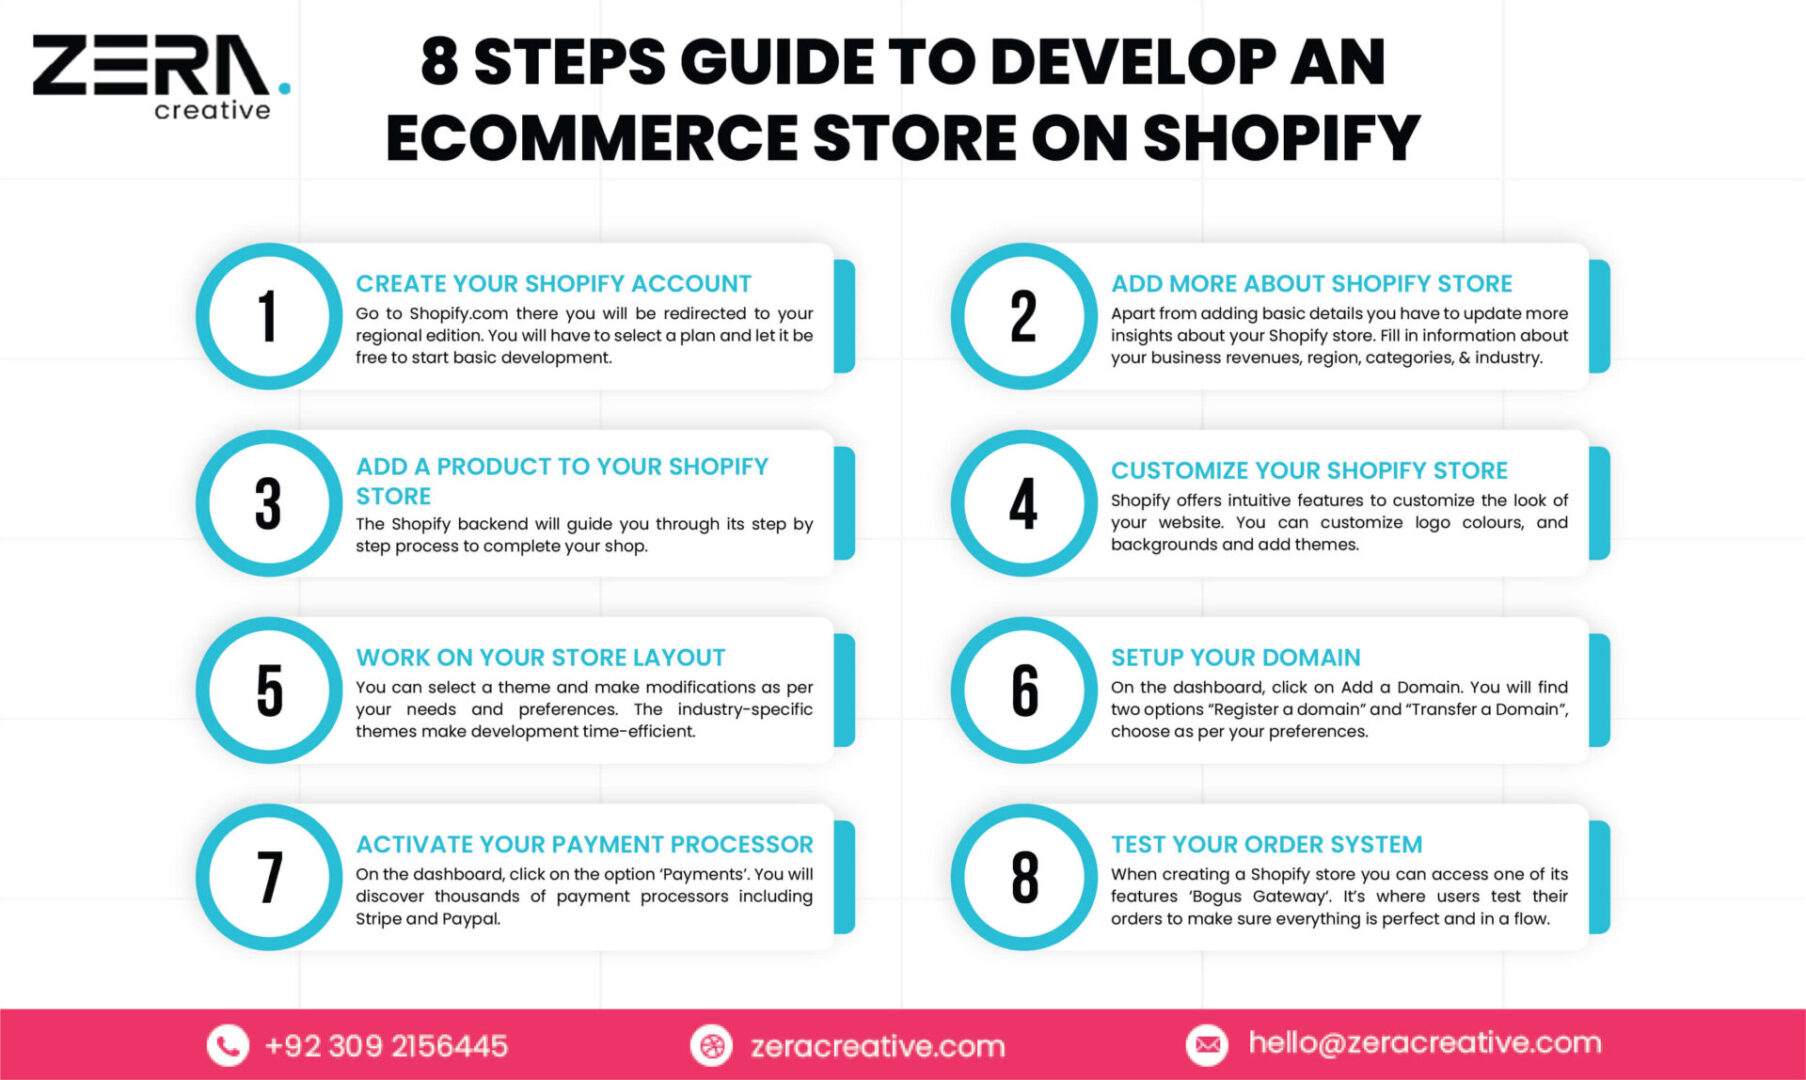
Shopify with easy incredible features brings you closer to achieving your goals. It does not only offer intuitive development techniques but its modern layouts, mobile-friendly themes, and a plethora of templates help you build a robust store. Follow these 8 simple steps to use Shopify for an eCommerce store.
Step #1- Create your Shopify Account
Go to Shopify.com there you will be redirected to your regional edition. You will have to select a plan and let it be free to start basic development. Next will be to create an account. You will find the option in the top right corner. Click on it and fill out the fields that require basic information about your brand and user id. You have to verify via email. Once your account is created proceed to the next step.

Step #2 – Add More About Your Shopify Store
Apart from adding basic details you have to update more insights about your Shopify store. Fill in the information about your business revenues, region, categories, and industry. From there you will be directed to the admin page. Now it’s time for setting up your Shopify store, let’s begin.
Step #3 – Add a Product to Your Shopify Store
In the admin screen of your website, you can add products from your store. The Shopify backend will guide you through its step-by-step process to complete your shop. Its add product page is made similar to that on WordPress. Add meta title, description, and other details. Upload a high-definition image and click upload. Do check the go through the content in case of any error. You can even add different categories of your products to make it easier for visitors to shop.
Step #4 – Customize your Shopify Store
Shopify offers intuitive features to customize the look of your website. You can customize logo colours, and backgrounds and add themes. With every change, you can click preview to see the final look. There is a huge colour palette to adjust as per your brand image. If you go for premium themes you will get to explore a bundle of amazing UI/UX. Moreover, you can perform CSS and HTML programming to add professional-level seamlessness to your store. The Shopify Expert page lets you go through coding hacks.
Step #5 – Work on Your Shopify Store Layout
Shopify lets you customize your storefront. It’s advisable to access its premium features. Whether you are familiar with coding and programming or not, you can easily improvise the look with drag and drop rules. You do not have to spend hours developing a store. It’s easy and simple. The best part is adding motion to whichever section you want.
You can select a theme and make modifications as per your needs and preferences. The industry-specific themes make development time-efficient. You get a targeted layout with the most updated sections and features. Additionally, you can mix and fit sections from different themes as well.

Step #6 – Setup Your Domain
It’s time to link your store to your domain. Make your store more official by following these simple steps. On the dashboard, click on Add a Domain. You will find two options “Register a domain” and “Transfer a Domain”, choose as per your preferences. Even if you purchase a domain from other platforms you can link it to your Shopify store; however, you have to update your DNS records. Once you activate it you can easily access your eCommerce store.
While working on the main area of your store make sure that the following information is fully updated.
General – In the setting area complete the information related to billing and legal details.
Taxes – Click on the ‘charges taxes’ section available next to the Variant section on the website.
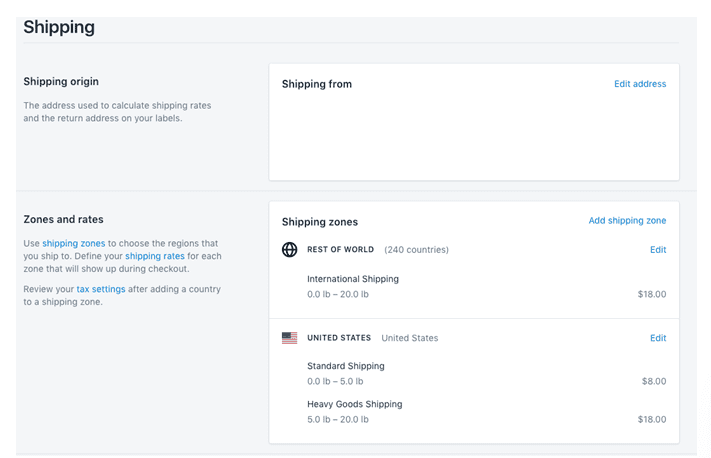
Shipping – Click on the ‘requires shipping’ option to guide buyers about the shipment details. You have to update the weight-based shipment details.
Step #7- Activate Your Payment Processor
On the dashboard, click on the option ‘Payments’. You will discover thousands of payment processors including Stripe and Paypal. Shopify offers its built-in payment processors to developers which are efficient, secure, and advanced. It gives you a complete walk-through of how to integrate and use it. To make your checkout process smooth and transparent, go through the Payment Gateways. Here are the important aspects to create a secure payment gateway.
The transaction fees – Go for the payment gateway that charges the lowest amount on every transaction your buyer makes.
Card Types – Your gateway should accept a wide variety of bank cards. It ensures eliminating card abandonment.
Offsite Checkout – You can even go for offsite payment gateways where the third party takes customers to their platform to make the payments. It’s a secure solution but a bit complex.
Step #8 – Test your Order System
When creating a Shopify store you can access one of its features ‘Bogus Gateway‘. It’s where users test their orders to make sure everything is perfect and in a flow. What you can do is, carry out the buying process just like a customer from dropping products in the cart to checking out through any of the payment processes. But do cancel the order just in time to get the money refunded. It will give you a clearer overview of how well your store works.
Wrap Up
On your Shopify eCommerce store, you can integrate newsletters, and discount offers and even initiate dropshipping plans. Do you want to unleash your creativity and make a brand-centric store to power struck your business? If so, get connected to Zera Creative and build a highly responsive e-commerce store under your budget.


